Here's what you'll need:
2x10 Board {We bought ours at Lowes. The original length was 8' but for my project we cut it down to about 35". I'll be using the rest for other projects.}
Spray paint {For the spray paint and board, both of which can be used on other projects, the cost was about $15.}
4x6 Photo frames {I found mine at Dollar General for $1.50 each}
Hot glue gun
Photos {Here's a flickr site that gives literally hundreds of options for letter art for FREE that you can print off on your home computer...yayyy!!!}
Sand paper {Optional...only if you want to create an antiqued look}
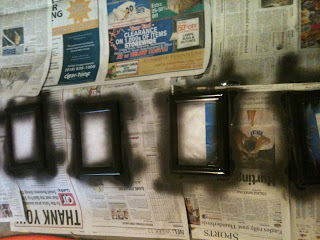
Here's my frames! I decided to spray paint them a dark walnut color, but before doing that, remove the glass, if possible. The glass in my frames wouldn't come out without breaking the entire frame, so you can either tape off the glass or slide a piece of paper in between the glass and and frame. I tried both and sliding the piece of paper worked much better. But don't worry...if you do end up getting some paint on the glass, it can be easily scratched off with a toothpick.
Make sure you lay something underneath the frames before you spray paint. I used two coats of paint. Do the same thing with the 2x10. Be sure one side is completely dry before flipping it over. I used Satin Red Garnet by Valspar for my board. It turned out a really pretty barn red. After my board dried, I used sand paper on the edges to give it an antiqued look.
After frames have dried, remove the holder from back of frames. This will make it easier to glue it to the board.
Cut and insert the 4x6 pictures that you printed off into the frame. I turned all of my pictures into black and whites.
Lay out and measure the frames on the board. Mine were 2" away from the outside right and left edges and about 3/4" away from the top and bottom. I spaced my frames 1" apart from each other. Then use glue gun on all four corners and press on board.
And there you have it! A wonderful and personalized Christmas gift! You can read Shanty-2-Chic's how-to here. Let me know if you end up making one for yourself! :)


3 comments:
that is way cute and creative. i'm totally going to check out that site and the letter site! thanks for sharing!
I am having trouble printing the letters to fir 4X6 frame. I have a mac and I am not sure how to make it so the letter is not cut off?
@Kyla do you have Word on your Mac? That's what I ended up having to use to print them off and get them to be the right size. If that doesn't work, maybe try resizing the photographs in a free program like photobucket. Hope that helps!
Post a Comment