Showing posts with label for craftiness sake. Show all posts

Saturday, December 17, 2011

Christmas on a Budget II: DIY Recipe Card/Photo Holder

Here's yet another gift giving idea! This sweet little craft can be used for lots of things {photo holder, love notes, daily reminder}, but I think I especially like the idea of using it as a recipe card holder! The great thing about it is you can use the leftover wood and paint from your letter art decor to make this! 

Here's what you'll need!

  • Furniture Dowel Rod Cap {I found mine in the wood section at Hobby Lobby - 3 for $1.47}
  • Clothes Pins {Also in the wood section at Hobby Lobby - 24 pack for $3.47}
  • Furniture Tacks {Near the material section at Hobby Lobby - 1 pack of 180/$2.21}
  • Burlap or Scrapbook paper {Burlap can be found in any material store - About $3.99/yard. You will only need about 1/8 yard for this project.}
  • Piece of wood {Like I said, I used leftover wood. Mine was a 2x10 and 8" long. If you need it cut, Home Depot will cut it for you.}
  • Spray paint {For this one, I used Satin Red Garnet by Valspar. I plan on using Dark Walnut on another project.}
  • Spray adhesive
  • Hot glue gun
  • Sand paper {optional}


1. Cut your wood to the size you want. Mine was 8" long. Spray paint wood, dowel rod cap and clothes pin. Let dry.
2.{Optional} After paint dried, I used sand paper to sand the edges of the project to create a rustic look. Just a preference....but I think it adds character! :)

3. Use a hot glue gun to glue dowel rod cap to top of board.
4. Cut piece of burlap about 1" smaller than board. Spray with spray adhesive glue and place in center of board.
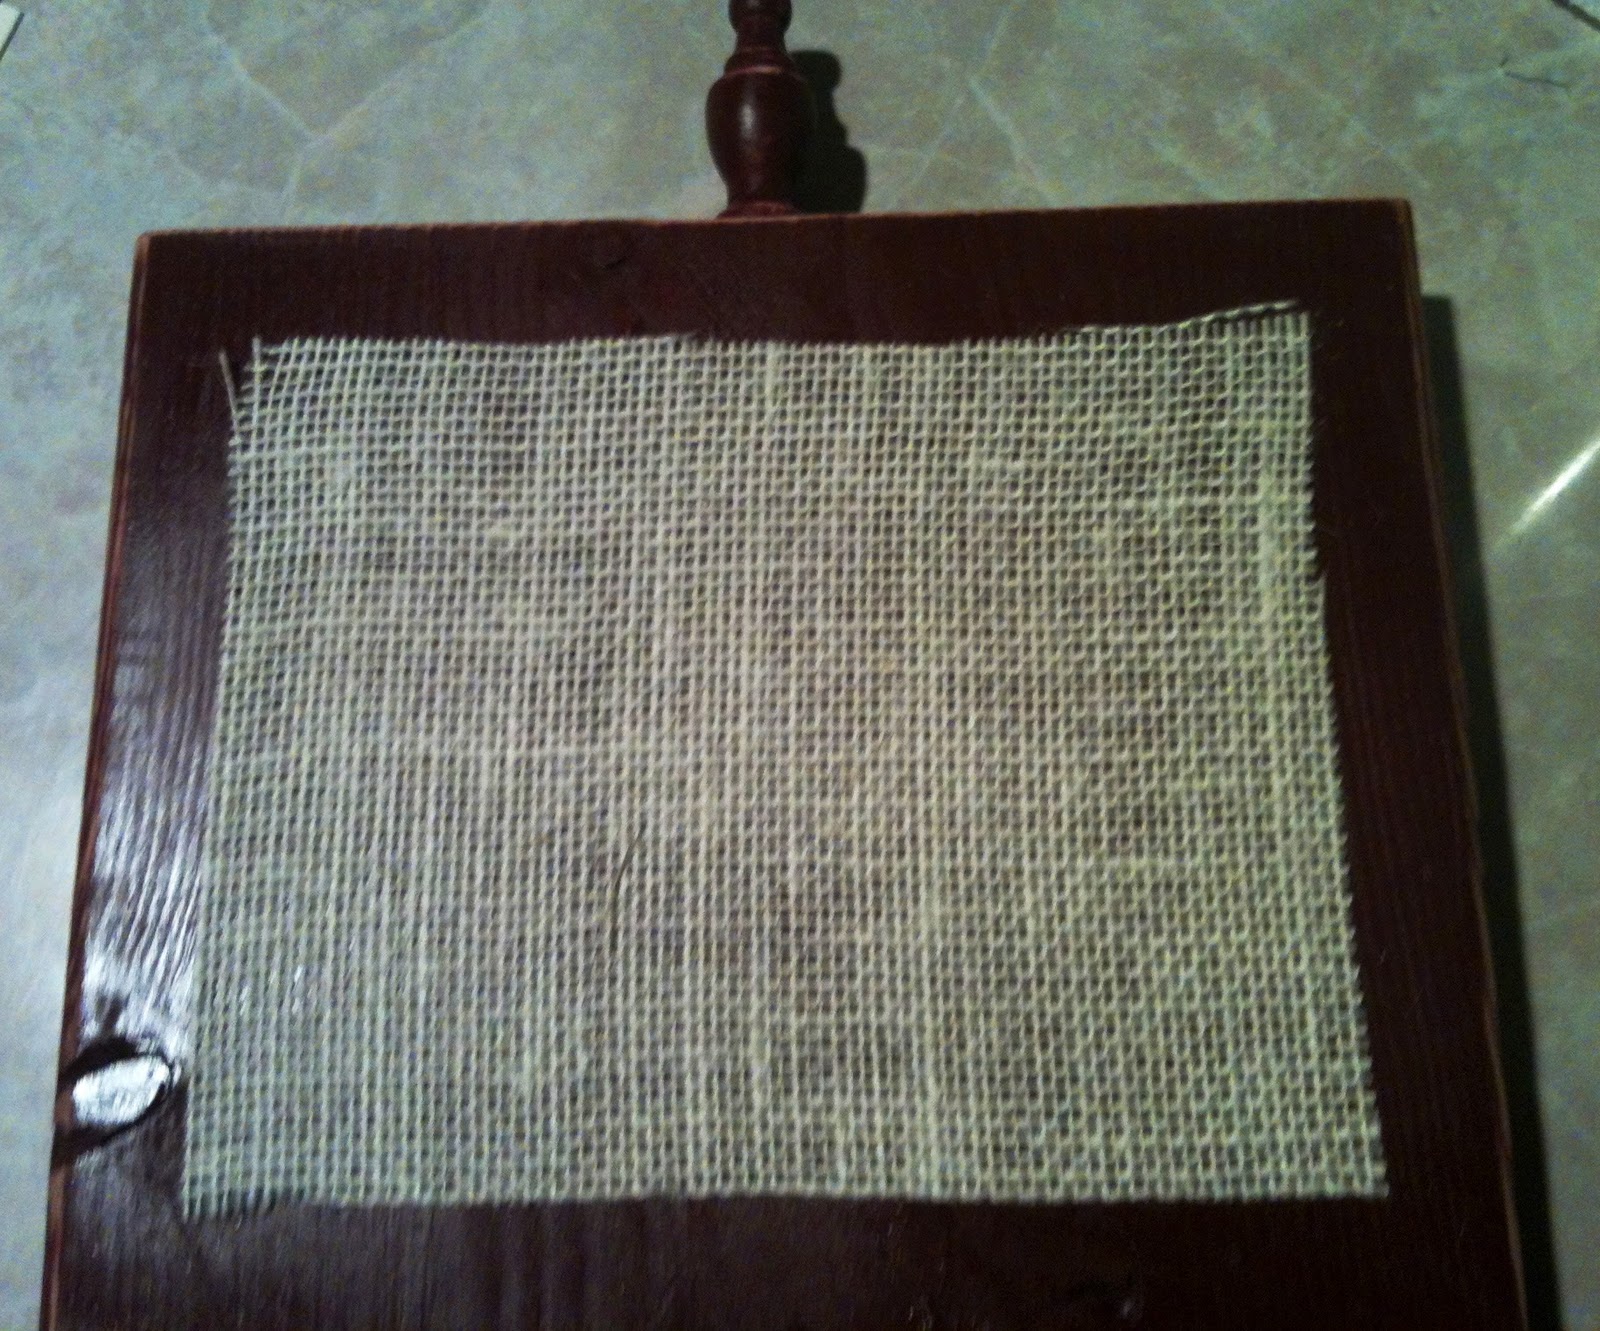
5. Use a hammer to nail furniture in all four corners of board. This is just an extra assurance to hold the burlap onto the board. And once again, I think it adds character! ;)
6. Use a glue gun to attach clothes pin to top of board.
7. I used some extra burlap to create a cute little flower for the bottom of the board. You can find a great tutorial on how to do that here! I wanted my flower to have a little more depth, so I sprayed a little bit of my paint on a newspaper, dipped a wadded up paper towel in the paint and sponged it on to the burlap flower. I LOVE how it turned out!! I then used a glue gun to stick it on the bottom right corner of the board.

Ta-da!! So fun and easy! I got this idea from shanty-2-chic. There's tons of other variations of this craft and plenty of ways to make it your own!  If we break down the cost and round up, all-in-all it was about $7.00 to make the entire project! Not too shabby! :)

Sunday, December 04, 2011

Christmas on a Budget: DIY Letter Art Decor

So I stumbled upon this blog on none other than the oh-so-awesome, Pinterest! I truly am addicted and inspired by that whole site! Anyway, with our finances this year, Matt and I are having to be very careful about every little penny, so that makes Christmas gifts a little tricky! Enter Shanty-2-Chic. This is seriously the cutest blog and I've gotten so many craft ideas from there {a couple which I will use in the next few weeks}! Here's today's project that will end up in the loving home of my mom & dad {they have received strict instructions not to look at my blog until after Christmas!}!

Here's what you'll need:
2x10 Board {We bought ours at Lowes. The original length was 8' but for my project we cut it down to about 35". I'll be using the rest for other projects.}
Spray paint {For the spray paint and board, both of which can be used on other projects, the cost was about $15.}
4x6 Photo frames {I found mine at Dollar General for $1.50 each}
Hot glue gun
Photos {Here's a flickr site that gives literally hundreds of options for letter art for FREE that you can print off on your home computer...yayyy!!!}
Sand paper {Optional...only if you want to create an antiqued look}


Here's my frames! I decided to spray paint them a dark walnut color, but before doing that, remove the glass, if possible. The glass in my frames wouldn't come out without breaking the entire frame, so you can either tape off the glass or slide a piece of paper in between the glass and and frame. I tried both and sliding the piece of paper worked much better. But don't worry...if you do end up getting some paint on the glass, it can be easily scratched off with a toothpick.

Make sure you lay something underneath the frames before you spray paint. I used two coats of paint. Do the same thing with the 2x10. Be sure one side is completely dry before flipping it over. I used Satin Red Garnet by Valspar for my board. It turned out a really pretty barn red.  After my board dried, I used sand paper on the edges to give it an antiqued look.


After frames have dried, remove the holder from back of frames. This will make it easier to glue it to the board. 

Cut and insert the 4x6 pictures that you printed off into the frame. I turned all of my pictures into black and whites.
Lay out and measure the frames on the board. Mine were 2" away from the outside right and left edges and about 3/4" away from the top and bottom.  I spaced my frames 1" apart from each other.  Then use glue gun on all four corners and press on board. 


And there you have it! A wonderful and personalized Christmas gift! You can read Shanty-2-Chic's how-to here. Let me know if you end up making one for yourself! :)

Monday, November 07, 2011

DIY Photo Prop // Mantel Decor

As the holidays approach, I can feel all things crafty swelling up inside of me!! Here's a little project I worked on this weekend and I'll admit, I feel a little silly posting it because it really is so simple, but I guess that's what I love most about it! The best part is that it can double as holiday decor! So first things first, here's what you'll need:


Mod Podge {But really, what craft project doesn't need it?!}
Scrapbook Paper
Cardstock paper {About 3 sheets}
Letter cut outs {I found mine here. They're about 3x3 inches}
Ribbon or Twine {Approx. 6 ft in length}
Scotch tape {Sorry, forgot to include those in the picture!}
Scissors
  • Step One: Cut out the letters and trace on to cardstock paper and scrapbook paper. Cut out.
  • Step Two: Use the mod podge {or any other glue you have on hand} to glue the cardstock and scrapbook paper together. The letters need to have some kind of weight to them in order for them to hang right on the ribbon. Let dry.
  • Step Three: Cut ribbon to desired length. I had about 13 letters and used approximately 6 ft of ribbon. My ribbon was 3/8" in length.
  • Step Four: Turn papers over so front of letter is facing down.  Use tape to connect ribbon to letters. {Shown below}

Ta-da! Hanging letters! And now you have a re-usable photo prop that doubles as an adorable mantel accessory!  Matt and I used this in a photo shoot we did for the oh-so-darling Chang family this weekend! I'm think it will look great hanging below the mantel this holiday season!


And please don't mind the naked mantel, we're in the middle of re-decorating/renovating our in-laws living room so the mantle hasn't quite yet had the TLC that it deserves! But here's something to give you an idea of what it might look like! I'm thinking this idea will come in handy for baby showers!

Saturday, August 27, 2011

DIY dress....No Sewing Required!


So I've been dying to try this ever since I saw a picture of it on Pinterest! Only one problem.....the tutorial on how to do it was in some language that I had NO idea how to read!! Haha! So, with a little experimenting and coaxing my husband to take some pictures....here's a tutorial on how to turn his shirt in to her dress!
 Step 1: My husband's shirt was an XL. I buttoned the third button down into the third slit on the other side
Step 2: If you're wearing the shirt, take the sleeve from the right side and cross over on top of the left sleeve.
Step 3 & 4: Take the right sleeve that you crossed over the top and push up under the bottom left sleeve so there's a loop hole {see picture below}.
Step 5 & 6: With your thumb and index finger in the loop hole described in Steps 3 & 4, pull the left sleeve that was on bottom through the loop hole. {Be sure to only pull it halfway through....don't pull the end of the sleeve thru....the part with the buttons. It helps make the other part of the bow!}

Step 7: Fix the loop hole and end of the left sleeve to look like a bow. 
Step 8: Pull down on the right sleeve to tighten up the bow.
Then......
Make it your own! :)  I'm thinking of pairing it with some leggings for a fun fall/winter look!

Hopefully this tutorial helps! 
Let me know if I need to explain anything better! Enjoy your new dress!


Saturday, July 30, 2011

A Lovely Saturday Evening Post

Ok, it's more like a Saturday afternoon post, but evening sounds better for the title.

What a lovely Saturday!

The morning began with a lovely hour and a half jog.

Followed by a crafting afternoon that turned this:


Into this!


{I bought the case off ebay for $3.97 and the bow at target $3.39 for a pack of six. Super glue the bow to the cover and ta-da! Girlified iphone case!}

The day will end with a date night with my hubby
where we will watch
CRAZY.STUPID.LOVE.

How's your Saturday turning out?!

Tuesday, May 17, 2011

{to die} faux

So I am one of those people that's always full of new ideas that, at the time, seem like such a great thing and I get all excited and passionate about it!!!.....and then, it never happens. Call it a problem with follow through, but I prefer to think of it as a clashing combination of A.D.D. and creative juices flowing way too freely throughout my body! {Did someone just say squirrel?!} Anyway, I thought that I'd share with you the newest "kick" that I'm on...sponsored by the oh-so-fabulous ka-ka-ka-Kara! {She just started a blog that I think is absolutely hilarious! Check it out here!}  Anyway, she's a stay-at-home momma {to one of the sweetest little boys who refers to me as "Marnie"} who's super creative and has an amazing voice! {Seriously, when she becomes famous and is on stage with her long blonde hair and bare feet singing her pretty little heart out, I'll be able to say, "I'm the one who gets pedicures with her!"}  Oh how I love a good pedicure! Now you know what I'm talking about when I say A. capital D.D.!  Back to the "kick"....Kara casually mentioned to me that she had been thinking about taking a class down in Dallas to learn how to faux paint and asked if I would maybe be interested in doing that with her.  Umm....would I ever?!  Talk about a fun job!!  How fun would it be to be able to remodel furniture and go into houses, changing the entire look and feel of a room?! I love the idea! I've been telling Matt for quite a while now  that I hope that one day, I'll be able to find a job where I'll make lots of money and be able to come and go as I please {sounds like a nice dream, right?! Good thing I like dreaming! :)}  Don't get me wrong, I just started a new job and I'm SOOOO thankful for it {and the people I work with are pretty, well really, great!}, but I would just ell-oh-vee-eee a job where I would get to be creative! So in honor of this new "kick", here are some of my favorite faux creations! :)


Tuesday, April 19, 2011

nesting {the headboard edition}

Isn't it funny how you appreciate things so much more when you don't have them?? Well the past few weeks I've been appreciating having our own home. Not because we're homeless or anything {don't fret yourself}, but because since moving to Tulsa, we had to leave our {sweet little} housy back in Lawton and move in with the in-laws until our house sold and we could buy a place of our own here.  Now we have everything we need and my in-laws have been so sweet about letting us live with them, but it's just not the same as having your own home {a place to ooze domestic creativity}!
I've been in a sort of nesting mode {and no, I'm not pregnant. Sorry mom!} lately! I'm coming up with all these crafty ideas to do in our {future} home and I get so excited about it!!! There will probably be many more of these posts to come, but I like to call this one the "headboard edition."  Matt and I already have an absolutely gorgeous bedroom set that his dad built us {and when I say gorgeous, I really do mean the craftsmanship doesn't get any better than this!}, but our guest bedroom is severely lacking in that area.  And since Matt gets his own man-cave which he gets to decorate with all his OSU/Dallas Cowboys/boy stuff, I get to decorate the guest bedroom with girly stuff! {For the record, he said he needed a "man-cave" because I took over the rest of the house. Oops! Sorry, honey! Hehe :)} My starting place with the guest bedroom is a headboard. I figured if I could find out what kind of headboard I want, it will determine the "feel" that I want to achieve in the rest of the room. Here are some of my favorites so far:


Thursday, March 24, 2011

the handy-man can!

Fact: I'm horrible at visualizing things! That's why when Matt first started talking about remodeling our kitchen and telling me all the ideas he had, I {kinda} freaked out! At that time, I was still living in Salt Lake so it made it that much more difficult to visualize things the way they could be. That's why he had to draw me this picture:
But before I get too far ahead in the story, let me start from the beginning. Matt bought our house about four years ago from some {very dear} friends. The house was built in the 70s, so it needed {a lot of} updating! He started by putting in harwood floors in the master bedroom, re-doing the entry way, knocking out a wall to open up the dining room and the living room and tearing out the {flourescent]} lights in the kitchen {thank goodness!!}. All that stuff was done B.M. {Before Marcie...me}.  When I came into the picture, all of the remodeling energies were directed at the kitchen. This was mainly for the fact that

Saturday, January 29, 2011

my {love} affair with mod {podge}

Being a new wifey has introduced me to a whole new world of craftiness and cooking! And over Christmas, our house was invaded with a lovely little bottle of modge podge. So in honor of that glorious event, this post will be dedicated to a couple of my favorite projects! :)

Project #1: Mod Podge Mantle
Inspiration: Pottery Barn
Supplies:
Old Window Frame
Wooden letters
Scrapbook Paper
Scissors
Tape

I already told you that Matt and I's first Christmas was very simple and {extremely} special! All of our decorations were either lent to us by friends or homemade by our own two hands {my favorite kind!}. When Matt and I were down with his family over Thanksgiving, he let me drag him on an adventure to Restore, which is a store under the umbrella of Habitat for Humanity. All of the houses that Habitat for Humanity restores have to first be "gutted" out. All of the old windows, doors, molding, tile, stoves, toilets {ewwww!} and anything else you can imagine that gets torn out of house, all gets sent to Restore. Donations may also be made there, as well. Anyway, it doesn't sound that interesting, but let me tell you, the store is a craft lover's dream!

So Matt drove me to Restore and after getting over my initial "awe," I found some of the most incredible window frames that became the foundation for my project. The frame that I used for this project was only $5....gasp! I know, right?! I'm totally the girl that has to tell everyone when I get a good deal! Haha! So I found the frame, we headed home and I headed to Hobby Lobby where I found wooden letter cut-outs, scrapbook paper and mod podge. Then, I traced the letters on to scrapbook paper, mod podged the scrapbook paper onto the letters and after they were dry, used scotch tape to stick them to the window. If you wanted the letters to stick on the window permanently, you could use mod podge to stick them to the windows. I used tape so I can switch out the letters for different seasons! So fun! And here's the final reveal....
TA-DA!

Project #2: Mod Podge Coasters
Inspiration: Mumsy Girl

Supplies:
4"x4" Tiles
Felt
Scrapbook Paper
Ceramic Craft Paint
Mod Podge

One of my friends recently got married and I wanted to do something a little more personalized for her than just the typical gift card. Her whole kitchen was going to be decorated in turqoise and brown, so I used that as a starting place. I went to Hobby Lobby and found three different patterns of turqoise and brown scrapbook paper, grabbed some brown ceramic paint and felt and headed to Home Depot to pick up some 4"x4" tiles.
Once I had all the supplies, I went home and started in on the coasters!

Step 1: Paint the outside edges of the tiles with the ceramic paint. I only paint the parts that won't be covered by the scrapbook paper. Let dry.

Step 2: After the paint has dried, I mod podge the scrapbook paper on to the tile. Depending on the size and style of the tile you use, I pre-cut the scrapbook paper small enough to leave about 1/4" outside border. Let dry.

Step 3: Once the mod podged has dried, apply a layer of mod podge all over the tile, covering both the scrapbook paper and tile. Let dry and apply a second coat. Let dry.

Step 4: After both coats of mod podge have dried, use a glue gun to glue the pre-cut felt on to the bottom of the tile. Let dry.

You're done! Here's one of my finished products!
These were so fun to make and easy to personalize! I made some a few sets and gave them as Christmas gifts! And who doesn't love something homemade?!
Related Posts Plugin for WordPress, Blogger...