Showing posts with label DIY. Show all posts

Sunday, April 08, 2012

An Easter Outfit + DIY

Happy {Hoppy} Easter!!!! 
The Mister and I {and our two sweet girls} had a fabulous weekend! 
Not only did we do a Route 66 meet up with two of our favorite people, but Matt's family drove into town for a good ol' family holiday! Easter is such an exciting time of year and our church somehow incorporated a little number from "Grease" {yes, the movie!} into the message! Super creative and I'm pretty sure it's never {ever} been done before! That's probably why we love them! :)
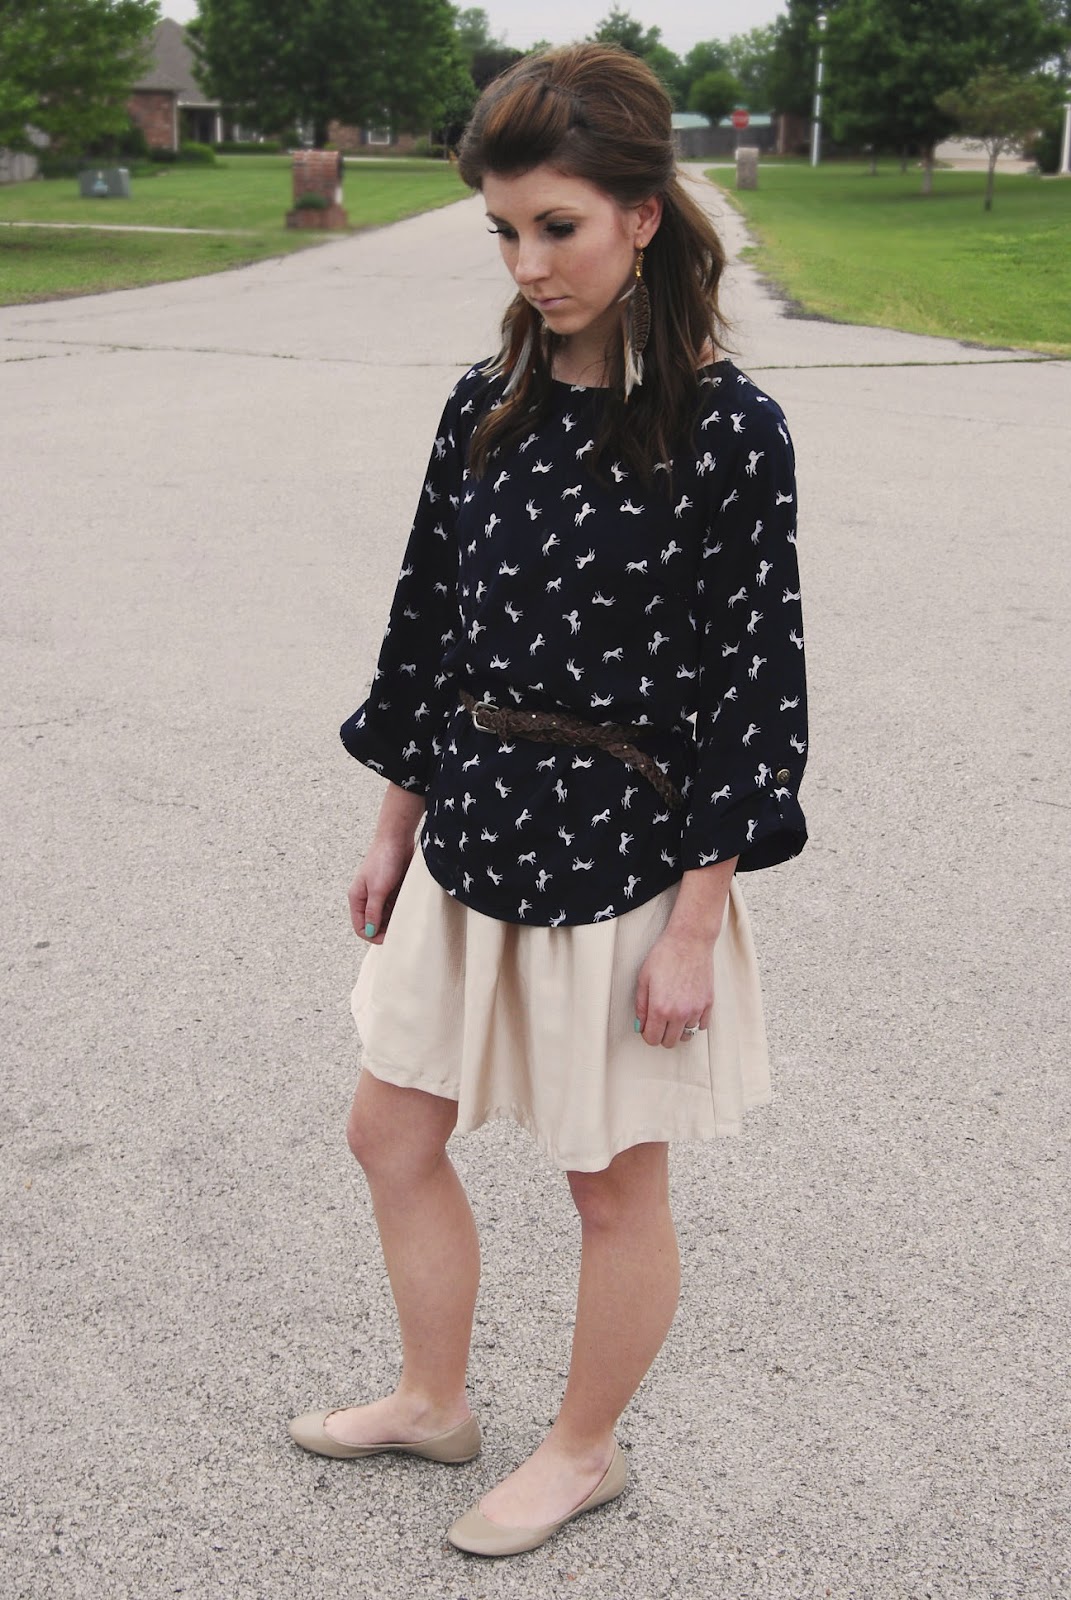
And since one of the funnest part of Easter is getting a new outfit {which mine is not} I thought I would share mine {plus a little sumfin, sumfin at the end}!

Shirt: Similar, Belt: Here, Shoes: Here, Earrings: Similar, Lipstick: Mac Sheen Supreme - Happy Hibiscous


Now comes the DIY part!
Let's zoom in a little bit on the nails {more specifically, the ring finger}:

After a little experimenting today, I figured out how to get this fun, vintage, lacy look! 
Ready?! Here's what you'll need:

Lace
Mod Podge
Paint brush
Nail polish {I used Essie Turqoise and Caicos}
  • Step One: Cut a piece of lace the size of your fingernail {or nails if you want to do more than one}. You want to make sure you use lace that doesn't have too much design so the color underneath shows thru!
  • Step Two: Paint fingernails with two coats of nail polish. When the second coat is almost, but not completely dry {I let mine dry for about two to three minutes}, press on the piece of lace that you have cut out. 
  • Step Three: Use a paint brush to cover lace with a thin layer of mod podge. Let dry.

Ta-da!! You're left with these fun puppies:


Wha'd ya think?!

Sunday, December 04, 2011

Christmas on a Budget: DIY Letter Art Decor

So I stumbled upon this blog on none other than the oh-so-awesome, Pinterest! I truly am addicted and inspired by that whole site! Anyway, with our finances this year, Matt and I are having to be very careful about every little penny, so that makes Christmas gifts a little tricky! Enter Shanty-2-Chic. This is seriously the cutest blog and I've gotten so many craft ideas from there {a couple which I will use in the next few weeks}! Here's today's project that will end up in the loving home of my mom & dad {they have received strict instructions not to look at my blog until after Christmas!}!

Here's what you'll need:
2x10 Board {We bought ours at Lowes. The original length was 8' but for my project we cut it down to about 35". I'll be using the rest for other projects.}
Spray paint {For the spray paint and board, both of which can be used on other projects, the cost was about $15.}
4x6 Photo frames {I found mine at Dollar General for $1.50 each}
Hot glue gun
Photos {Here's a flickr site that gives literally hundreds of options for letter art for FREE that you can print off on your home computer...yayyy!!!}
Sand paper {Optional...only if you want to create an antiqued look}


Here's my frames! I decided to spray paint them a dark walnut color, but before doing that, remove the glass, if possible. The glass in my frames wouldn't come out without breaking the entire frame, so you can either tape off the glass or slide a piece of paper in between the glass and and frame. I tried both and sliding the piece of paper worked much better. But don't worry...if you do end up getting some paint on the glass, it can be easily scratched off with a toothpick.

Make sure you lay something underneath the frames before you spray paint. I used two coats of paint. Do the same thing with the 2x10. Be sure one side is completely dry before flipping it over. I used Satin Red Garnet by Valspar for my board. It turned out a really pretty barn red.  After my board dried, I used sand paper on the edges to give it an antiqued look.


After frames have dried, remove the holder from back of frames. This will make it easier to glue it to the board. 

Cut and insert the 4x6 pictures that you printed off into the frame. I turned all of my pictures into black and whites.
Lay out and measure the frames on the board. Mine were 2" away from the outside right and left edges and about 3/4" away from the top and bottom.  I spaced my frames 1" apart from each other.  Then use glue gun on all four corners and press on board. 


And there you have it! A wonderful and personalized Christmas gift! You can read Shanty-2-Chic's how-to here. Let me know if you end up making one for yourself! :)

Monday, November 07, 2011

DIY Photo Prop // Mantel Decor

As the holidays approach, I can feel all things crafty swelling up inside of me!! Here's a little project I worked on this weekend and I'll admit, I feel a little silly posting it because it really is so simple, but I guess that's what I love most about it! The best part is that it can double as holiday decor! So first things first, here's what you'll need:


Mod Podge {But really, what craft project doesn't need it?!}
Scrapbook Paper
Cardstock paper {About 3 sheets}
Letter cut outs {I found mine here. They're about 3x3 inches}
Ribbon or Twine {Approx. 6 ft in length}
Scotch tape {Sorry, forgot to include those in the picture!}
Scissors
  • Step One: Cut out the letters and trace on to cardstock paper and scrapbook paper. Cut out.
  • Step Two: Use the mod podge {or any other glue you have on hand} to glue the cardstock and scrapbook paper together. The letters need to have some kind of weight to them in order for them to hang right on the ribbon. Let dry.
  • Step Three: Cut ribbon to desired length. I had about 13 letters and used approximately 6 ft of ribbon. My ribbon was 3/8" in length.
  • Step Four: Turn papers over so front of letter is facing down.  Use tape to connect ribbon to letters. {Shown below}

Ta-da! Hanging letters! And now you have a re-usable photo prop that doubles as an adorable mantel accessory!  Matt and I used this in a photo shoot we did for the oh-so-darling Chang family this weekend! I'm think it will look great hanging below the mantel this holiday season!


And please don't mind the naked mantel, we're in the middle of re-decorating/renovating our in-laws living room so the mantle hasn't quite yet had the TLC that it deserves! But here's something to give you an idea of what it might look like! I'm thinking this idea will come in handy for baby showers!

Wednesday, July 13, 2011

LovAcado


I've said it before and I'll say it again....if I could have a love affair, it would be with avocados!!!!! I just absolutely ell-oh-vee-ee them {that spells LOVE, for those of you who didn't grow up on the mickey mouse club songs}! And just when you thought they couldn't get any better, I'm here to introduce you to a brand new way of using them for oh-so-wonderful results! But before I do that, let's take a quick look at the health benefits that they provide!
Numero Uno: Cancer Prevention
Avocados not only taste delicious, but they've also been shown to inhibit the growth of prostate cancer, seek out oral pre-cancerous and cancerous cells and destroy them without harming healthy cells  and helps prevent breast cancer! Need I go on?!
2{dos}:Lower cholesterol
Three{tres}:Anti-aging
Quads{cuatro} thru {infinity and beyond}:Stroke prevention, eye health, better nutrient absorption....etcetera, etcetera, etcetera!
Learn more about them
and {here}

Anyway, what can I say, they speak for themselves! I know you're already reaching for that bag of chips and salsa so you can make some guacamole! BUT WAIT!!!!! Before you use up that whole avocado, set aside a tablespoon of it for a special therapeutical treat: 
DIY Avocado Facial

Take that tablespoon of avocado that you set aside {approximate} and mash it up until it's all sorts of mushy! Then, lather on a clean, dry face and let sit for about 10 minutes! Rinse and.....ta-da! Introducing the softest face you've ever had!

Now, if you're like me, you're going, "Put an avocado on my face?! YEAH RIGHT!!" And you're right, it sounds crazy! I was saying the exact same thing. My face is the most temperamental thing you'll ever see, so it took my mom {a Mary Kay sales rep and all-around makeup goo-roo} a few times trying it and convincing me my face wouldn't erupt into a mountain of oozing zits before I tried this wonderful DIY spa trick.  But let me just say, it's now part of my weekly masking ritual. The skin perks of this mask include: Vitamins A & C {both help with anti-aging}, anti-microbial properties and oils to help moisturize. I'll stop there because I'm starting to sound like one of those late night infomercials! Read more about the health benefits here.

Let me know if you try it! If you're anything like me, I'm always up for anything all-natural!! I think my next step will be the banana facial! How much crazier can it get?!

Related Posts Plugin for WordPress, Blogger...